On the pattern sheet in the upper right hand corner is an inch box that you use to test the accuracy of the pattern. If that box does not measure an inch, then you won't get 2" finished HST squares. At first, when I printed the sheet, I measured the inch box and kept getting 1/8" shorter than 1". After a few frustrated tries in which I couldn't get a 1" accurate printing, I finally figured out to look at the printer settings. My printer was automatically adjusting the size of the image to fit the preset settings. When I removed that setting, I was able to print the pattern accurately.
On this sheet, you'll see both dashed and solid lines. You sew on the dashed lines and cut on the solid lines. I've drawn the direction of the sewing line so that you can sew all the lines continuously without having to cut your thread.
To begin this process, cut two pieces of fabric that is the size of the paper.
Place the fabrics right sides together, and then place the paper pattern on top. Pin the layers together, and then begin sewing on the dashed lines.
After all the lines are sewn, cut the paper pattern on all the vertical and horizontal solid lines until you end up with 9 rectangles.
Cut each rectangle in half on the diagonal solid line.
Remove the paper from the fabric.
Press the triangles apart and trim off the ears.
Now you're ready to put the block together!
Cut 4 - 2.5" squares for the corners of the block in the background fabric:
With the HSTs, arrange the squares until you like the design of the block. You can arrange the squares like this:
Or like this:
Once you decide on the pattern, pin two squares together at a time and chain stitch them.
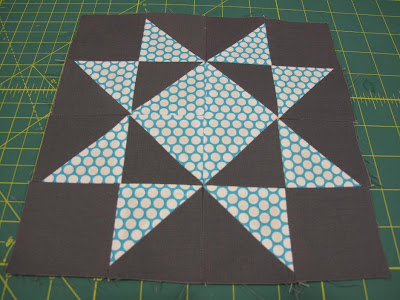
Continue sewing the squares together until each quarter of the block is completed. Sew 2 quarters together and then two halves together and you get ...
the completed block!


It looked a bit complicated to start with,,, wow good job done xx
ReplyDeleteWhat a great idea - would love to give it a go as the result is fantastic!
ReplyDelete