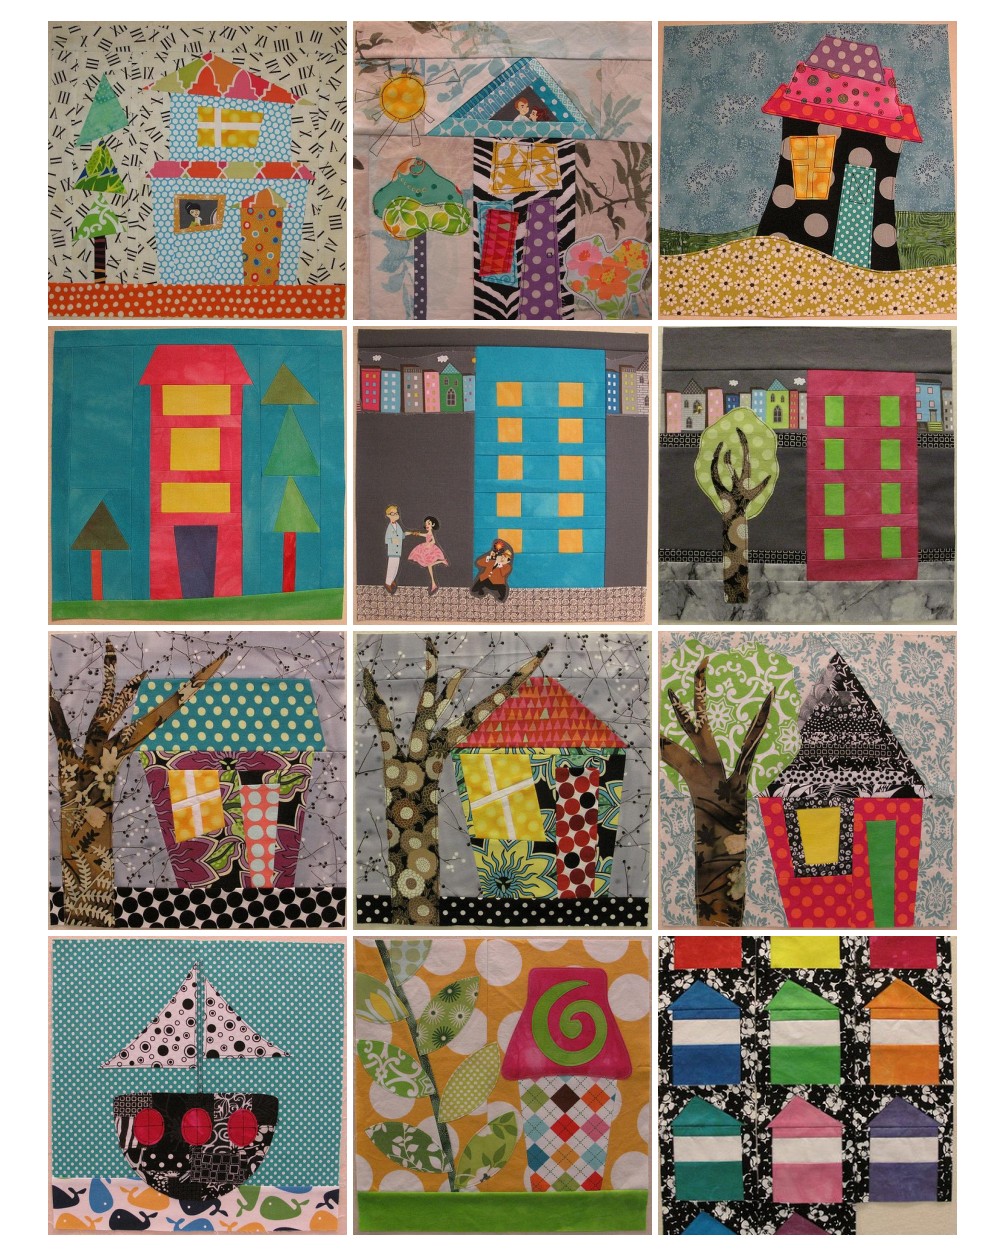
It's finally done - all 11 Wonky House blocks with the siggy blocks! I'm so happy that they're finished and ready to be sent out tomorrow. It was a great swap, and the people in it were fabulous. Their blocks inspired me to try new techniques and embrace freeform piecing, which is way out of the comfort zone for anal me.
Here they are:
With the exception of Wonky House #1, all the blocks were done free-form, including the siggy Wonky House blocks. I actually made 15 Wonky House blocks, but kept 4 so I can make a wallhanging with them (will post the pictures soon).
I enjoyed this swap so much that I'm going to join the Wonky Stars and Wonky Trees swap, which is coming up soon.
I hope you enjoy these houses as much as I did making them!
Showing posts with label Block Swap - Wonky House. Show all posts
Sunday, January 29, 2012
Tuesday, January 24, 2012
Love the Wonky Houses!
I'm a part of the Wonky House block swap and have been working on the 12 blocks to be sent out by March. This is my most recent one and it's my favorite!
A close-up of the tree and girls:
I was inspired by the tutorial that I found on the comfortstitching blog by Aneela Hoey. It was a tutorial on raw-edge applique to make the girl on a tree swing mini quilt. It is such a beautiful quilt and I loved the technique. I wanted to use it in this Wonky House block.
I started by cutting a piece of light fusible webbing to the size of the house and ironing on pieces of aqua scraps that I had.
Once this was done, the rest of the block just evolved. I enjoyed the raw applique so I added the tree, girls and clouds, and sewed around each with the rayon thread.
I'm really loving this particular swap because each block is different, and made with a different technique. Many of them have been done freeform, which is way out of my comfort zone, but I really like the end result. I've learned a lot of new techniques with this swap, and I'll be sad when it's done. It's been a lot of fun!
A close-up of the tree and girls:
I was inspired by the tutorial that I found on the comfortstitching blog by Aneela Hoey. It was a tutorial on raw-edge applique to make the girl on a tree swing mini quilt. It is such a beautiful quilt and I loved the technique. I wanted to use it in this Wonky House block.
I started by cutting a piece of light fusible webbing to the size of the house and ironing on pieces of aqua scraps that I had.
After I covered the fusible webbing with fabric, I pressed the whole piece onto white fabric and began the raw edge applique. I used white rayon thread to sew around each piece of fabric. When I was done, I trimmed the block:
Once this was done, the rest of the block just evolved. I enjoyed the raw applique so I added the tree, girls and clouds, and sewed around each with the rayon thread.
I'm really loving this particular swap because each block is different, and made with a different technique. Many of them have been done freeform, which is way out of my comfort zone, but I really like the end result. I've learned a lot of new techniques with this swap, and I'll be sad when it's done. It's been a lot of fun!
Monday, December 19, 2011
Wonky House, take 2!
I'm still playing with the fabric selection for this block. This time, I tried a lighter background and added a different window for the lower portion of the window.
Shhh ... don't tell anyone that this block is a lot of fun!
I love how changing the fabrics changes the look of the block altogether!
Take 3 on its way ...
Shhh ... don't tell anyone that this block is a lot of fun!
I love how changing the fabrics changes the look of the block altogether!
Take 3 on its way ...
Sunday, December 18, 2011
Wonky House Swap Pattern!
I finally figured out my block for the Wonky House Swap. Whoo hoo! Thanks to the ladies of the Wonky House Block Swap who put together galleries of different wonky house blocks, I took parts of different blocks that I liked and came up with this:
The block is foundation pieced, and since I drafted it on the computer, I can print the pattern on vellum, which makes the piecing much easier. (See my post on why I print patterns on vellum). Since the pattern was fairly simple, I decided to make windows with sashing:
This was my prototype block so there will be some changes for the next one. The background will be lighter since this background doesn't contrast with the tree enough. And I will probably add another tree. Whatever changes I make will be minor because I'm loving this block! Can't wait for Christmas break when I can work on it!
Subscribe to:
Posts (Atom)
